 |
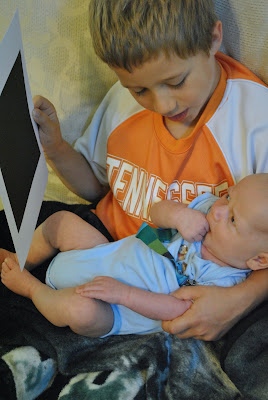
| Damien loving his new picture board, 8 weeks old |
Once baby is seeing more details (rather than just outlines), a great way to encourage them to use their vision and give them something interesting to look at and explore is to make a simple picture board.
In How Smart is Your Baby, Glenn Doman recommends adding different colored silhouettes of various objects to your baby's checkerboard, and rotating them regularly so that they don't become "like old wallpaper: beloved but not very stimulating".
There is the recommendation of course but not really any guidance on how to build this rotatable checkerboard.
Here was my solution:
I printed out the colored silhouettes and attached them to black and white squares, then laminated them. My original idea was to stick velcro dots on the back of each one along with velcro dots on the board, but with as many squares as there were it would end up not only being costly in velcro but also difficult to store all the now-bulky cards.
My solution was to make clear pockets on the checkerboard where the squares could be slid in, using clear contact paper. This tutorial will show you how to make those pockets.
 |
| Materials |
The materials you will need are:
- The checkerboard (a piece of foam board with 5-inch black squares glued on - tutorial here)
- The picture cards (printable color silhouette version available here, as well as a stencil [ink-saving] version here)
- 12-inch wide roll of clear contact paper
- Scissors
- Pencil
- Yard stick (or ruler, straightedge)
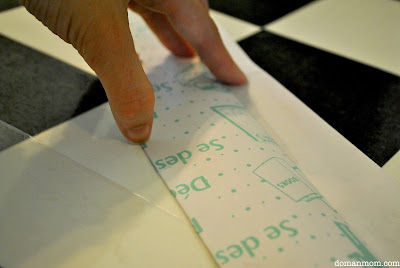
1. Cut a piece of contact paper that goes about an inch over each end of the checkerboard.
2. Cut that piece in half, to six inches wide. The piece you will use for your pocket should look like the one above.
The next step is to take that piece of contact paper, and fold part of it over so that it sticks to itself and creates a clear, non-sticky plastic pocket.
3. Use yardstick/ruler to make a straight line that is 2.5 inches away from the edge, then fold at that line, backing-side up, and crease with your fingernail.
You will then have this (above): a 2.5 inch "pocket"with one inch of sticky contact paper on the bottom to secure pocket to board.
4. Next, cut a piece out of the ends where they will wrap around. This part will secure to the back of the board.
The end result will look like this (above). It is important that you cut out this rectangle about a quarter inch past the end of the board. You don't want any of the sticky part of the contact paper to be on the front of the board - if there is, the picture cards will stick to it when you slide them to the edge.
5. Next, unfold contact paper, lay flat, and carefully remove backing.
6. Take the contact paper and very carefully fold it over so that the "pocket" section sticks to itself. Start in the middle, at the edge, and carefully smooth out little by little towards one end, then go back to the middle and smooth out towards the other end.
Note: you will notice from the above pictures that the contact paper was actually folded "backwards" when it still had the backing on it. This is very important to do because then it will "stand up". If you fold it the other way, as soon as you take off the backing the entire thing will stick to itself and will not be smooth at all.
Your end result should look like this.
7. Flip over the pocket you just made and line up the bottom of the non-sticky part with the bottom of one row of boxes on the checkerboard.
8. Smooth out pocket so it sticks securely to board.
9. Pull on end pieces as hard as you can to make the pocket lay as flat and tight as possible, then wrap around and attach sticky ends to back.
The end result (after you've added all of your pockets) should look something like this.
The folding and sticking the contact paper to itself is the hardest part - I actually had to throw away three different "pockets" due to incurable bubbles and wrinkles that happen when the contact paper sticks to itself too soon. Try not to be too worried about perfectionism, though - the point is to grow your baby's vision, not win any kind of award.
10. After you've made your board, get out your cards, slide some of them into the pockets, and enjoy!
It's as good idea to change out your cards and/or move them around daily. Keep baby visually exploring and, in turn, visually growing!
"Incline thine ear, O LORD, and hear; open thine eyes, O LORD, and see..."
Isaiah 37:17Damien is 8 weeks old


